Tip 1: Sorting Out Circles – The
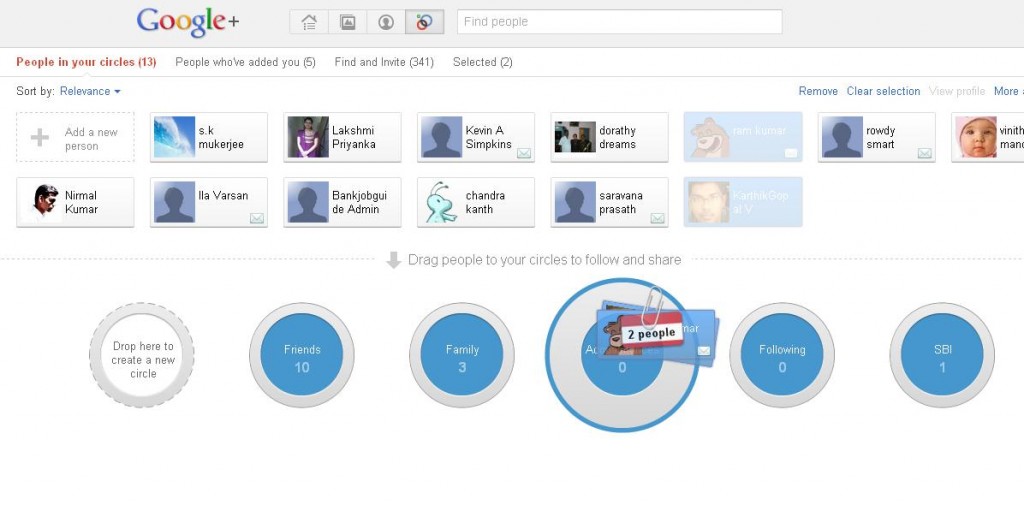
Circles are the center of attention on G+ (no pun intended here). The
idea of sorting out people into ‘can’t live without them’ – ‘they make
my work easier’ – ‘we guys think alike’ – ‘I don’t know what to do with
these people’, is quite appealing to most of us. In other words, you can
divide people into ‘Family’, ‘Friends’, ‘Colleagues’, ‘Acquaintances’
and almost any other category you can think of. You can add people from
Hotmail/Yahoo contacts and also from the ‘Suggestions’ box displayed on
the right hand side of the page. How to bring the Facebook contacts to
G+ ? There are a few Firefox and Google Chrome extensions that will do
the job. Move your contacts to Yahoo first and then bring them
to Google+.
Tip 2: Sharing With Chosen Circles- You
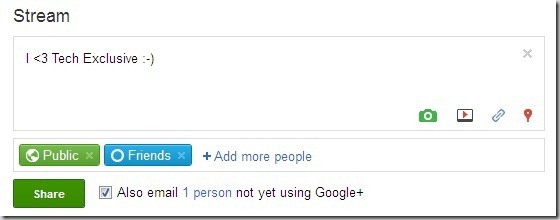
share ‘posts’ on Google+ (not status updates or tweets). Once you put
up something, you can choose which ‘Circle’ you want to share the update
with, their names will appear underneath the post in blue. If the post
is ‘Public’ (it is written in Green), anyone can see it in or outside
your circles. Once you have put up a post, there will be gray circle
with a triangle in it in the top right corner. Click on it for the
dropdown menu. From here you can- edit, delete or link to a post or
disable comments on a post. More importantly, if you choose ‘Disable
reshare’ then, no one can share it.
Tip 3: Handy Shortcuts For A Post: These are a few keyboard shortcuts, that you have seen before in Gmail too.
- Hit the ‘Space bar’ to scroll down the news stream
- Press ‘Shift + Space bar’ to scroll up the news stream
- Hit the ‘Q’ button to move the page up or down. Allows you to see Chat Option.
- Hit on ‘Enter’ to start a comment
- Press ‘Tab’, and then ‘Enter’ to submit a comment
- Hit ‘J’ button to go down one post
- Hit ‘K’ button to go up one post
Here are some simple codes, that will make posting faster on G+
For boldface, put asterisks before and after the *Word* – Word
For italics, put underscores before and after the _Word_ – Word
For strikethrough, put hyphen before and after the -Word- Word
For boldface, put asterisks before and after the *Word* – Word
For italics, put underscores before and after the _Word_ – Word
For strikethrough, put hyphen before and after the -Word- Word
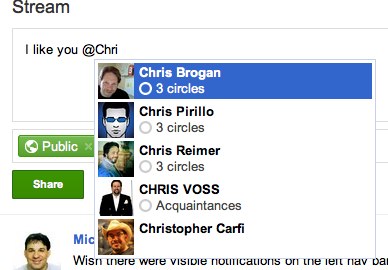
Tip 4: Share Your Blogs: You
can blog on G+ too. Start from concise 250 words posts. You can also
redirect your domain to Google+. Redirecting your root domain helps you
spread yourself. You may do so easily, as it’s shown in this example-
‘example-domain.com/+redirect’.
(COURTESY- toddrjordan.com )
Tip 5: Editing comments on others posts: You
can see what are the people in your Circles up to, via the stream. You
can choose the Circles you want to see on your stream or the news feed.
This way, it won’t be clogged with updates from people, you have no
interest in. When you comment on others’ posts, you can edit or delete
them, from the icons given below the ‘comment here bar’. So, if you want
to edit what you wrote, maybe rectify spelling mistakes, then make use
of the edit options.
(Courtesy- tech-exclusive.com )
Tip 6: Plus 1 A Post: Like
a friend’s post, or their picture? Then click on the ‘+1′ to like it.
Your name will be shown underneath the post saying that you have +1′ed
it, and the author of the post will get a notification that you like
their work. However, the post in question will not be shared on your
news feed. For people in your Circles to see it, you must ‘Share’ it.


Tip 7: Muting a Post: Your
stream showing one particular post all the time, then you can ‘Mute’
it. This means that it will no longer see it. This also works, if you
have commented or +1ed a post, then you will get a notification every
time someone else comments on the post. The flow of continuous
notifications can get irritating. In this case, you can go to the ‘Menu’
in upper right hand corner of the post and select ‘Mute this post’.
This will tell Google Plus to stop bugging you with it even when there’s
new activity, and will prevent your ever seeing this post in your
stream or notifications bar again.
Tip 8: The ‘Limited’ Sharing: You
can know, whether something that was shared with you is public/open to
all or with a select few. There will be a ‘Limited’ icon at the top of
the post, click on it to see who all are in tune with a particular post,
and seeing your comments on it.
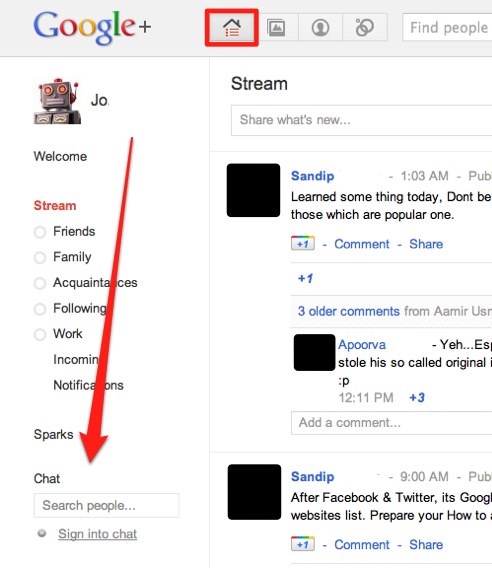
Tip 9 Chatting Tips: Google+
allows you to chat with people in your Circles. The Chat application is
at the bottom of the Left Navigation, and a simple click activates it.
The application is very similar to G-Talk, and you need a Google Chat
Plugin for the same. The most interesting feature is that you can choose
who you chat with. Identify the Circles, with which you want to chat
with. These people will be able to see you online, and chat with you.
However, for the chat to take place, the other person must also have
enabled Chat with you.
(COURTESY- wikihow.com )
Tip 10: Instant Messaging: This
can be a bit tricky, as G+ doesn’t have a direct personal message
option like Twitter or Facebook. For this too, you have to take the
‘Post’ route. Key in whatever you want to message, like you would do, if
you wanted to Post. After writing, click on the Share button and share
it with one chosen person only. Your ‘Post’ will become a message as it
will be seen by the concerned person only. Now, how can you make sure,
they don’t send it to someone else? Well, you can ‘Disable Reshare’ by
going to the menu on the upper right hand corner of the post and
selecting the “Disable Reshare” option.
Tip 11: Managing Notifications: You
will see the new Notifications, when someone commented on your post, or
added you to their Circle, or tagged a photo of you, on the Google+
Bar, right hand side. The number of notifications will be flagged in
Red. Now, the amazing thing about G+ is, that you can comment on status
updates right within the notifications menu-you don’t have to go to
another page for that! The drop down can display the entire stream on
that post, right there in the notifications drop down menu. You can go
right or left through new or old notifications if you want.

(COURTESY- snaphow.com )
Tip 12: Sharing On Facebook and Twitter: You
can use Chrome Extensions to add functionality to Google+. You can
share Google+ content on Facebook or Twitter. Let the old buddies know
what you have been up to on G+. The Google+ Facebook extension lets you
share and you can install the extension directly from Google Web Store.
Just go to- http://crossrider.com/install/519-google-facebook and get extension.
There is another option for integrating G+ with Facebook or Twitter. Go to-https://chrome.google.com/webstore/detail/oenpjldbckebacipkfbcoppmiflglnib
and download the app. This extension will add a ‘Share On’ tab below your posts. On clicking this you can choose, where you want this post to show. This little tab can let you share on Twitter, LinkedIn, Facebook, and Tumblr.
and download the app. This extension will add a ‘Share On’ tab below your posts. On clicking this you can choose, where you want this post to show. This little tab can let you share on Twitter, LinkedIn, Facebook, and Tumblr.
Tip 13: Sharing Photos And Videos on Google+ : You
can share a photo in many ways, wither through a post in the news
stream, or upload them from the G+ bar (you need to click on the camera
icon from the share box, then click on ‘Share’ to add it to the stream).
You can also do it from the ‘Upload Photos’ option from your home page.
You can add name tags to a photo by opening it in ‘lightbox’ view and
roving the mouse over the picture will pop up a ‘click to name’ option.
All you have to do is type the desired name in the box, and the picture
is tagged. Google+ and Picasa Web Albums are connected. You can upload
unlimited videos of 15 minutes duration each on Google+.
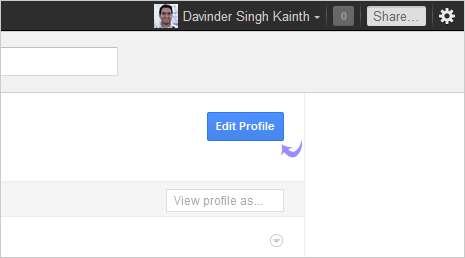
Tip 14: Managing Your Google+ Profile: Choose
how you want to come across on Google+. Select the ‘View Profile’
option and then choose to ‘Edit Profile’. Now, Google+ is preety amazing
at privacy. You can choose to share every information on the Profile
list differently. So, from your bio, to your photos, or your links, or
to a very different – ‘bragging rights’ section; you can choose what you
want to be visible to whom. Once you fill up any detail on your
profile, you will get a drop down menu about who you want to share it
with -’Anyone on the Web’ or with , specific circles, extended circles,
or even individual people or not at all. After Saving, do not forget to
click ‘Done Editing’ at the top of your profile page, to successfully
apply the changes made.
(Courtesy-tothepc.com )
Tip 15: How Others See Your Profile: Once
you have done up your profile, you can easily see how it has come out.
It’s obvious that you have chosen different people to see different
sections of your profile. You can see how each of them sees your
profile, as a user. For the same, reach the profile page from
the Google bar at the top- View profile route. There, you will see a
‘View Profile As’ box, in the category bar across the top. Now, key in
the name of the user you want, and you will see your profile as they see
it. Double check what you have shared and all.
Tip 16: Privacy Settings: Most
of us need to control what we share, hence the need for better privacy.
You can access your Privacy Settings by clicking on the tiny spoke
wheel thing on the top right corner. You can change your notification
settings by clicking on Google+ Settings. You can choose when do you
want to be notified- when you are tagged in a photo, or someone mentions
you in a post, or adds you to a circle. There are currently 11
notification options available.
Tip 17: Photo/Albums Privacy Settings: Once
you share a photo, you can do it with anyone on the web, or with people
in your circles as well as to anyone in their circles, or a customised
list of people or only you. You can specify whether to include photos on
your profile or not. You may also set up your photo tag approval
settings, so that you know where you are when someone tags you in a
photo.
Tip 18: Protecting Your Circles: So,
you are worried what might people think, if they got to know what
Circle you added them to? Then breathe easy, they won’t know. People
will be notified that you have added them to a Circle, but will not know
which one. When someone visits your profile, they see ‘Your name..has
these in his Circles’- this is like a friend list that is displayed for
visitors.
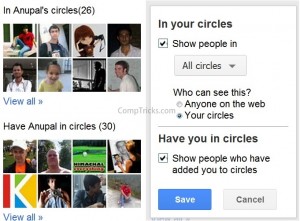
But,
if you don’t want people to know who all you are connected to, then you
can Edit your settings. On the ‘Edit Profile’ page, there is a section-
‘In circles.’ ( your name). Click on the Globe icon there- to bring up
an options box to let you customize who can see information about your
circles. Unselecting the top box will make information about who’s in
your circles totally private.
(Courtesy- comptricks.com )
Tip 19: Creating your own URL:
This one takes the cake for vanity.If the big, long URL of
yourGoogle Plus profile bothers you, then you can shorten it. You can
customise your URL by signing up at Google Plus Nick.
Tip 20: Accounting Switching: The
Google+ bar allows for multi account switching. For that you must have
enabled multi sign-in, then you can switch between the accounts using
the G+ bar. Click on your name on the Google bar and from the drop down
menu, select ‘Switch Account’
Google+
is working on other features as we speak-like integration with YouTube,
or Options for business pages. But for all newbies, the social platform
has quite enough options to keep busy for a while. The more you like
the interface- the more ‘plussed’ you are!
No comments:
Post a Comment