Now Here is The Step by Step Explanation of getting a free domain and set is as a custom Domain to your Blogspot Account.
1.Go To following Link Click Here
2.You will find a page like this


4.Select The Use DNS radio button and fill the detail as given below.

5.You can use any of the following IPs given below.
216.239.32.21
216.239.34.21
216.239.36.21
216.239.38.21
6.Now Select the duration of registration as 12 months. Click on SingUp.
7.Fill The all detail and conferm your Account by Your email address.
8.Go to Your Home page.

10.You will taken to the domain setup page.

11.Click to The Modify option and set one more new field to your domain setting
CNAME Rec
host-www
value-ghs.google.com
Refer below image

12.Now Save the settings. You are done from your domain setting.
13.Now you have to change little bit to your Google blogger setting also.
14.Go to Blogger setting page.

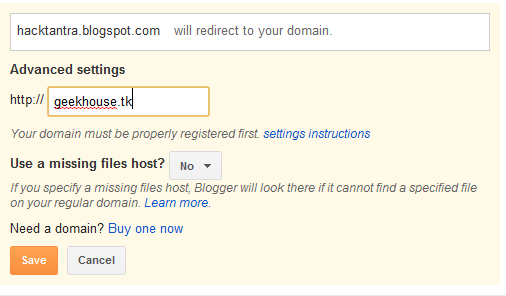
15.You can check the add custom address there.Click on it. you will get a new link saying " Switch to advance setting" click it.

16.Now a new text box will appear.
17.Fill it with your new domain address you registered just now.

18.Click Save.
19.Wait for few hour(1 hour for new blog and more than 8 hour for old and large blog)
20.Your blog will now automatically redirect to your new custom domain.

No comments:
Post a Comment